Time to grow!

Spring is finally here and it is time to get growing! This year I have added some new offerings to my garden, such as elderberries, roses, tulips, and mulberries. If there is one thing I know, it is that to loose yourself in the flow of something you love is a sure sign that you are in your element. The final frost date in my region is quickly approaching, which means this year’s garden will be planted out soon. I am excited to work on the growth of the season, both within and without, and to share the journey here.

Advertisement
Posted in Uncategorized | Leave a comment

Organic Curried Butternut Squash Latkes (gluten free!)

Ok I’ll admit it, I’m tired of potato latkes by the 6th night of Chanukah.  But I wanted to feel a little holiday spirit last night after the kids went to sleep, and as I perused the kitchen at 10pm I found myself face to face with 4 organic butternut squashes that are left over from my CSA farm share.  Now after having made 3 big batches of butternut squash soup already with my farm share bounty, I decided to try something new and exciting. With a little twist on the traditional latke recipe, I came up with something truly delicious enough to eat year round- perfectly golden and crispy with a beautiful orange color and an exceptional flavor.  And maybe the best part is, they are potato (and gluten) free!

Here’s what you will need:

1 small to medium sized organic butternut squash, peeled and de-seeded
1 medium onion, quartered
4 eggs
1 tsp cumin powder
1 Tbsp curry powder
1/4 cup olive oil
lots of freshly grated salt and pepper (to taste)

yield: 32-40 latkes

Using the grating disc of your food processor, grate the butternut squash and place in a mixing bowl.  Look at this beautiful orange color!

photo-287

Next, process the onion until smooth and add to the grated squash. Now add in the eggs, cumin, curry, salt and pepper and mix until well combined. Once your batter is assembled, coat your frying pan with about 1/4 inch of olive oil, and turn to medium-high heat. When hot, add heaping spoonfuls of your squash batter until the pan is full, pressing down slightly with your spatula to flatten the latkes. Cook until golden brown and crisp (about 3-4 minutes) then flip and brown the undersides. Continue frying your batter until it is all used up, adding in more olive oil as needed. Serve hot topped with sour cream for an unbelievably delicious treat!

Wishing you a healthy and happy Chanukah!

Posted in Uncategorized | 1 Comment

garden veggie burgers

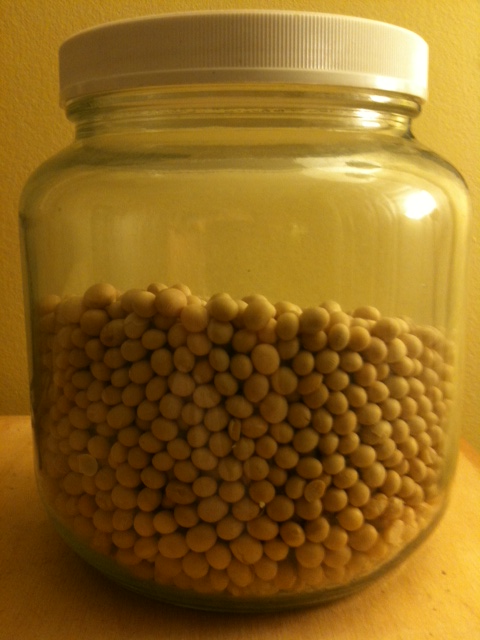
So today I was trying to come up with dinner ideas using limited supplies. I hadn’t been shopping in a while, definitely didn’t have the time or motivation to make a trip out, and there weren’t really any protein options lying around that my kids would be too keen on eating. Lately I’ve been trying to save money on my food budget, which means being creative with legumes as a source of protein. But let’s face it, there’s only so much tempeh, black beans and kidney beans a person wants to eat, even if they’re made with good seasonings and veggies. I happened to have some extra dried soybeans lying around, which I was thinking would probably never get used. (A few months ago I got really brave and attempted to make soy milk from scratch. It came out ok, but not something I’m really motivated to keep making, especially as I don’t want to consume tons of soy.) But tonight, I came up with an excellent plan for the rejected soybeans.


I know, I know, soy gets a bad rap. But pre-soaked, drained, boiled, and eaten occasionally like any other bean isn’t something I’m worried about. And soybeans are super cheap, even the organic ones… so… here’s a really yummy recipe for you to try on a limited budget.

What you will need:

1 cup dried soybeans, soaked, drained, and boiled
2 stalks celery, chopped
2 carrots, chopped
2 green onions, (1 regular onion can be substituted) chopped
4 garlic scapes (or 4 cloves of garlic)
3/4 cup bead crumbs (I made mine from leftover whole-grain challah)
2 tsp salt
1 tsp white pepper
1 Tbsp thyme
1 Tbsp organic sugar (optional)
olive oil for frying

In a food processor combine all the veggies, onions and garlic and finely chop them up (feel free to substitute whatever veggies you have on hand). Pour them into a mixing bowl. Next add the soybeans to your food processor (they will be more than 1 cup after cooking as they expand to at least 2x their original size) and blend them until smooth. Add them into the mixing bowl with the veggies. Next pour in the bread crumbs and seasonings, mixing well. Shape into patties and fry in olive oil on medium heat until golden brown and crispy on both sides. Serve hot and enjoy! This recipe makes about 16 burgers.

I’m looking forward to eating the leftovers for lunch!

Posted in Uncategorized | Leave a comment

Passover Crepes: Gluten Free

There’s nothing I’d rather be eating more this Passover than delicious gluten-free crepes! You can fill them with your favorite roasted veggies, cheeses, fruits, or even meat.  They can also turn leftovers into an exciting and appealing meal.

What you will need:

1/4 cup potato starch
1 cup milk (water can be used as a substitute if you don’t do dairy)
4 eggs
enough oil to coat the pan

Beat together all the ingredients until smooth. You will want to use a non-stick skillet so that the crepes flip easily. Heat your skillet over medium heat, then add enough oil to coat the pan. Pour about 2-3 tablespoons of batter into skillet. Immediately spread the batter to about 6 inches in diameter.
  Cook until bottom is golden brown. Flip crepe and cook for about 1 more minute. Makes about 12 crepes.  You definitely want to double this recipe and have leftovers!

Posted in Uncategorized | Tagged | Leave a comment

what’s growing in early spring

Here’s a little update on what’s growing here in my garden in Amherst, MA by April 1st. Even though it’s been an incredibly mild winter, it’s still a little too early for asparagus, strawberries, and snow peas- but those will be up soon. In the meantime, we’ve got some fun things happening…

First of all, daffodils make me smile!

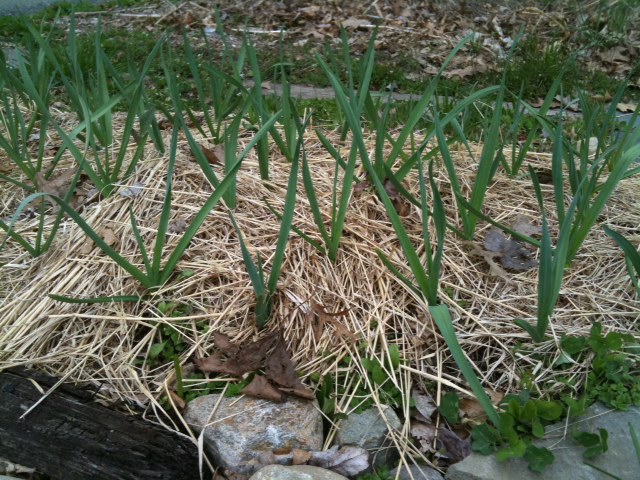
The garlic that we planted last fall is all up and doing well!

Our cold frame veggies have all sprouted and look pretty good.  In the cold frame we have tot soi, kale, beet greens, lettuce, mixed cooking greens, onions, and carrots.  Pictured here are the baby beets.

We also have some survivor kale from last year.  This over-wintered kale will produce seed pods this year.

In addition there are many culinary herbs coming back to life, including lemon balm, oregano, thyme, lavender, sage, hyssop, monarda, dandelion, and chives.  We are looking forward to all the spring veggies and herbs to come!  In the meantime, life is crazy and we’re trying not to forget to stop and smell the flowers.  These hyacinth flowers emit a heavenly scent- and if you blink you’ll miss them!

Posted in Uncategorized | Leave a comment

planting our cold-frame garden

Yesterday my family and I planted our cold-frame garden, and we’re really excited!  A cold-frame is basically a mini greenhouse that traps light and heat, warming up the soil inside and allowing for an extended gardening season.  This is our cold frame.

It’s basically a big wooden frame with a glass door for a lid, and a bit of insulation on the interior walls.  Nothing fancy, and it’s made from all recycled materials.  Last fall we prepared the location for our cold frame right in front of our house, which is south-facing and therefore gets full sunlight all day.  Inside we added a layer of decomposing mulch hay in order to add some organic matter to the sorely depleted soil.  After a few months of letting the hay decompose further, we amended the soil again by adding in a layer of organic compost.  We hope the worms will like it.

Next we waited a few days for the soil to get nice and warm inside.  When I opened up the cold frame this past Sunday afternoon, it was steamy and very warm!  Time to plant our seeds!

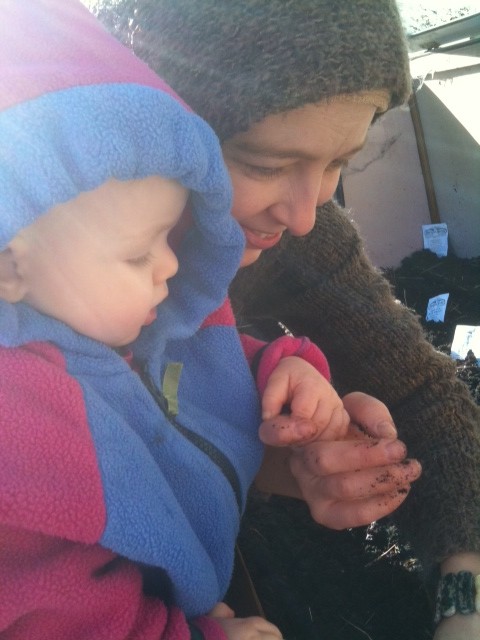
We chose cold-hardy varieties of vegetables to plant, being that it’s February.  All in all we found space in the cold frame to densely plant kale, tot-soi greens, mixed cooking greens, mixed salad greens, beets, carrots, red and yellow onions.  It was fun getting our hands in the dirt.

I think this one was especially excited.

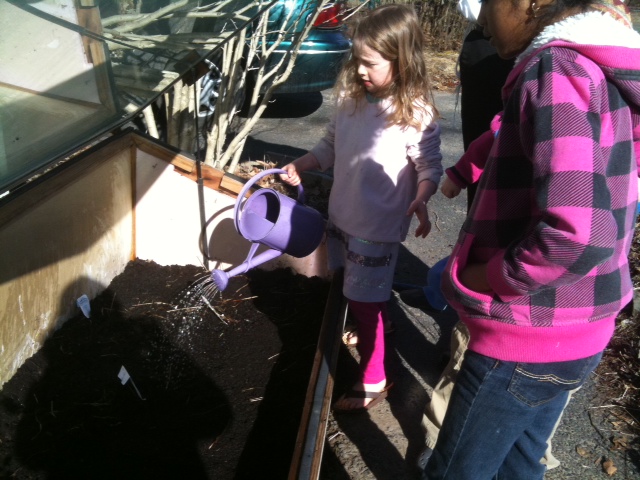
Next we did a little watering, making sure all the seeds got moistened.  Some of our neighborhood friends stopped by to join in the fun as well.

So now we will wait to see what becomes of our little cold frame garden.  We’ve never planted outside this early before, but I’m hopeful that soon we will be getting some yummy greens to eat…  I’ll be sure to keep you posted!

Posted in Uncategorized | Leave a comment

7 tips for boosting your immune system naturally

Here are 7 tips for naturally boosting and supporting your immune system throughout the year, and especially during changes in the seasons.  The following medicinal foods, herbs, mushrooms, vitamins and minerals can be easily added to your diet to help give your immune system added support whenever you need it.

1) Eat Raw Garlic Pesto

For fighting an acute illness or oncoming cold/flu try raw garlic pesto! It’s simple and easy, and very effective.  Garlic (Allium sativum) has natural antibacterial and anti-viral properties, and contains allicin, a powerful antioxidant.  Simply chop us as much raw garlic as you think you can handle, then mix it with olive oil, sea salt, thyme, and basil (thyme is an amazing herb also renown for its antibacterial and antiviral properties).  Now it’s time to get creative- spread your pesto on a piece of toast, or mix with chopped tomatoes to make bruchetta, add it to a veggie wrap, use it as a salad dressing, or consume it any other way that sounds appealing!

2) Drink Ginger-Lemon Tea with Raw Honey

Ginger is a great herb to use when fighting a fever, a cold or flu, a sore throat, and especially an upset stomach.  Ginger is one of the very best herbs for aiding digestion, and has been widely shown to relax the stomach and relieve the feeling of nausea.   This warming herb also opens up the throat and gently increases circulation throughout the body.   Brewed as a tea, ginger induces sweating, which helps fevers run their course.

Lemons are also an incredible healing food which can aid in boosting immunity.  One large lemon contains about 45 mg of Vitamin C, 75% of the daily requirement!  Vitamin C helps to neutralize and reduce the effect of free radicals that contribute to illness.  Please, don’t toss the rind of your lemon!  The lemon peel is actually the most medicinal part of the fruit, as it contains two compounds –limonin and limonene – which appear to help inhibit some of the cell divisions that may cause cancer.  You can grate your lemon peel for use in baking, cooking, or as a tea (please only use the rind of organic lemons).

Raw honey can be used both as a delicious food and as a soothing and potent medicine. It contains potent antibacterial and antiseptic properties, as well as antioxidants, and can be used in the treatment of coughs and sore throats, and it is useful as a general tonic for the immune system.

To make a pot of fresh ginger-lemon honey tea, add 1-2 inches of thinly sliced fresh ginger root, 2 tsps raw honey, and the juice of one fresh lemon (or 2 Tbsp) to your tea-pot.  Add boiling water, steep for 10 minutes, and enjoy the immediate effects!

3) Cook up some Healing Miso Soup- with Reishi Mushrooms and Astragalus

Miso soup is one of the most healing foods on the planet, especially when you add in lots of healthy veggies and herbs such as ginger and garlic to the pot.  (See my original recipe for Healing Miso Soup for more about the medicinal properties of miso).  Consumption of miso is linked with up to 50% reduced risk of breast cancer as reported in the Journal of the National Cancer Institute.  Now I know you’re probably just trying to ward off the next cold and flu, but if miso is powerful enough to fight off major disease, it can certainly help your short-term health significantly as well.  So even by itself, miso paste has amazing health benefits, but to amp up the medicinal potency of your soup even more- and to support your immune system even further- add in some reishi mushrooms and astragalus to your pot of soup.

Reishi mushrooms, known in China as an “elixir of immortality,” have been revered in Traditional Chinese Medicine (TCM) for thousands of years as one of the most important herbs for increased longevity.  Modern research has confirmed that this mushroom strengthens the immune system, helps fight viruses and bacteria, reduces cholesterol, and helps prevent fatigue.  The triterpenes, polysaccharides, and vitamins in reishi mushrooms are thought to be responsible for their therapeutic effects, which include the ability to increase blood flow, to stimulate the immune cells, and to reduce inflammation.  The polysaccharides found in reishi mushrooms increase the body’s immune response, and trigger the production of a type of white blood cell that kills a wide range of infectious microorganisms and tumor cells.  Reishi mushrooms also have strong antioxidant properties, which can protect the body from the harmful effects of radiation and free radicals.  Reishi mushrooms have also been shown to suppress tumor growth and are often used in cancer prevention and treatment.

Astragalus (Astragalus membranaceus) has also been used in TCM for thousands of years.  Astragaus is called an adaptogen, meaning it is thought to help protect the body against various stresses, including physical, mental, or emotional stress.  Astragalus is used to protect and support the immune system, to prevent colds and upper respiratory infections, to lower blood pressure, to treat diabetes, to protect the liver, and it may even help protect the body from diseases such as cancer.  Astragalus has antibacterial and anti-inflammatory properties, and studies have shown that this herb has antiviral properties that stimulate the immune system, making it a great addition to your toolbox of home remedies for building your health and immunity.

So when you’re run down, think- miso soup.  And when you add in reishi mushrooms and astragalus, you’ll put the healing quality of your dinner over the top!  To add the reishi and astragalus herbs to your soup, simply follow the recipe for Healing Miso Soup, and add in the additional herbs as your soup comes to a simmer.  Reishi mushrooms and astragalus are not palatable and should be removed before serving (or left in the bottom of your bowl).  If you would like to order dried reishi mushrooms and astragalus, I can put together a package of these herbs for your convenience.  (Please see How To Order Products if you are interested.)

4) Use Elderberries and Echinacea

There are many immune-enhancing herbs available, but hands down my two favorites are elderberries and echicacea.  Taken together, either as a tea (see elderberry echinacea tea) or as a syrup (see elderberry elixir), these herbs gently improve immune function and are useful when fighting off a cold or flu.  You can also try these herbs in tincture form (in an alcohol base), however when taken as a tea or syrup, the nourishing qualities of these herbs are slightly enhanced.

Elderberry (sambucus nigras) has been used traditionally for centuries to treat colds, flus, respiratory infections, and fever.  Elderberry is rich in vitamin C and antioxidants- namely the flavonoids rutin and quercetin.  These agents stimulate the immune system to increase production of cytokines, specifically IL-1 beta, TNF-alpha, IL-6, and IL-8.  The berries also contain water-soluble compounds called anthocyanins that provide an anti-inflammatory effect, which may explain why elderberry effectively reduces fever.  One study conducted by Israeli virologist Madeline Mumcuoglu, Ph.D. has revealed the mechanism behind the extract’s reputed ability to counter the flu virus.  She discovered that elderberry extract inhibits invading viral cells from penetrating and infecting healthy cells with the neuraminidase enzyme, thereby preventing replication of the virus in the body. In addition, she and her team found that viral enzymes became neutralized when elderberry extract was introduced into the body.  Elderberry has a naturally sweet flavor, making it an excellent remedy for children.

Echinacea (echinacea angustafolia) is an herbaceous flower that is used to gently stimulate the immune system when fighting cold, upper respiratory infections, as well as the flu.  The root of this herb is the most potent part of the plant, however the entire flowering plant can be used for it’s immunne-enhancing qualities.  Internal use of echinacea can help to increase the body’s production of white blood cells as well as increase production of  interferon, which is used by the body to neutralize viruses.  According to researchers at the University of Maryland Medical Center, echinacea contains several chemicals that play a role in its therapeutic effects, including polysaccharides, glycoproteins, alkamides, volatile oils, and flavonoids.

5) Try Steam Inhalation with Essential Oils

Therapeutic use of essential oils, also known as aromatherapy, is an area of alternative medicine that should not be overlooked, especially when trying to improve immune function.  Essential oils are a powerful and extremely concentrated medicine that can be used for fighting bacteria and viruses, and are especially effective in helping to fight upper respiratory and sinus infections.  Essential oils are obtained from herbs by distillation- a process by which a very large amount of herb yields a small amount of pure essential oil.  These oils are therefore very concentrated, and extreme caution must be exercised when using them.  Essential oils should never be taken internally without professional advice, and should be diluted with olive oil when applied to the skin to avoid irritation.  The healing properties of essential oils have tremendous potential to reduce our reliance on pharmaceuticals because of their potent and effective anti-bacterial, anti-septic, anti-fungal, anti-inflammatory anti-viral and expectorant properties (amongst others).   If you would like to learn more about the science behind the therapeutic use of steam inhalation with essential oils see this article from the Oxford Journal of Antimicrobial Chemotherapy.  Making a facial steam is truly easy and I highly recommend you try this out next time you have a cold and experience the effects for yourself.  Simply bring a pot of water to boil and pour hot water into a bowl.  Put 2-3 drops of tea tree, eucalyptus, or lavender essential oil into the bowl, then quickly place your face over the bowl and cover your head and shoulders with a towel, effectively trapping the steam under the towel.

Breath in the steam for 5 minutes with your eyes closed, and the towel fully covering you.  Do not add more than 2-3 drops of essential oil.  If the oils are too intense, you can lift the towel briefly and let in fresh air, then re-cover yourself and continue the steam therapy.  Make sure you have some tissues handy as this treatment will be sure to help clear out congestion.  You can use this treatment 2-3x per day as long as symptoms of congestion persist.  If you have asthma, please consult with your health care provider before using steam therapy.  You can also try putting 5-10 drops of lavender essential oil in a hot bath for added relaxation and immune enhancing effects when you’re not feeling well.

6) Supplement with Zinc and Vitamin D 

I don’t usually recommend high doses of synthetic vitamins and minerals, as I believe that these substances are best absorbed directly from whole food sources.  That being said, there are some supplements that have been proven to be quite helpful and effective when trying to increase immune response.

Zinc is an important mineral which is found in high concentrations in our white and red blood cells.  Zinc, when taken at first onset of illness, has been widely proven to shorten the duration of illness, as well as to decrease the severity of symptoms.  I have found it to be very effective for treating a sore throat.  For more information on the health benefits of zinc, see this recent article published by The New York Times.

Vitamin D has been the subject of a lot of research over the past decade, and is emerging as a highly important component of natural disease prevention.  Vitamin D is a fat-soluble vitamin which attaches directly to cellular DNA and is involved in prevention of autoimmune diseases, multiple sclerosis, heart disease, and cancer.  Vitamin D is also crucial for the absorption and metabolism of calcium and phosphorous, which are especially important for the maintenance of healthy bones.  Recent findings suggest Vitamin D helps the immune system fight off viral illness like the flu, as well as to prevent and treat the common cold.  A new study published in the Archives of Internal Medicine showed that patients with low vitamin D levels had 40% more flu episodes.  Another study released in May of 2010 by the American Journal of Clinical Nutrition proved Vitamin D supplements to be highly effective at preventing the flu.  The study was a randomized, double-blind study with two groups of school aged children- one group was supplemented with 1200 IUs of daily Vitamin D, while others were given a placebo.  The children who took vitamin D had a 42% reduced risk of catching the flu!  I urge you to consider adding Vitamin D to your diet as a part of your disease prevention strategy, but before supplementing with Vitamin D, you may wish to get your blood levels tested by your doctor.

7) Let Your Body Rest

Sometimes illness is simply a message that we need to slow down and let our bodies rest so that healing can occur naturally.  So if you’re feeling run down, gift yourself with a little extra TLC- go to bed early for a few nights, try to manage your stress, take frequent hot baths or showers, do nothing extra, and try to get outside for some fresh air or a brisk walk once a day.  Sometimes all we can do to help support our immune system is to surrender to the process- and allow ourselves some extra guilt-free rest and relaxation.



Posted in Uncategorized | 3 Comments

backyard chickens: a city girl takes the plunge

Have you ever considered the idea of getting your own backyard chickens?  I was pretty much obsessed with the idea of getting backyard chickens before finally taking the plunge.  Over the course of a year I amassed a huge collection of empty egg cartons and entertained dreams of collecting my own locally grown farm fresh eggs.  I imagined picking green onions and spinach from my garden in early spring and cooking up morning omlettes.  I compared countless chicken coops, scavenging craigslist and chicken websites for the perfect design.  I wondered which breed would be the best, and how many chickens we would ideally want to keep.  Raising chickens was becoming an obsession, but having never raised any farm animals before, our backyard chicken adventure definitely proved to be quite a learning experience!  Here I hope our chicken adventure will prove informative to you as well.

So, lets start at the beginning.  Once you’ve decided you like the idea of collecting fresh eggs, and you’d like to get a few of your own feathered friends, the first step is to contact the local town government and find out what are the existing zoning laws regarding backyard chickens.  Surprisingly, the town of Amherst where I currenly live (a rural and suburban setting with lots of farms nearby) had a lot of red tape when it came to getting a permit for keeping chickens in my backyard.  This year, with the amount of people interested in raising backyard chickens on the rise, enough people in Amherst got fed up with the zoning laws and petitioned for the laws to be revised.  Subsequently, the zoning laws in Amherst have been revised to make it much easier to have backyard hens.  But I was over zealous and jumped in 2 years before these changes had taken place.  So what did I have to go through to get my 6 hens, you ask?  Ah, yes… good times, good times.  First, I had to file an application with a fee of $110 to town hall.  Seriously? Next, I had to notify everyone within 300 ft of my house by mail (over 65 houses!) about my intention to get chickens (another $25). Next, I had to have not one, but two site visits by members of the zoning board to my home on two separate occasions (more on that later).  Then, I had to write and submit an extremely detailed management plan on how I would care for the chickens, and to top it all off I had to appear at a hearing in town hall to defend my proposal publicly in front of the zoning board.  In all honesty, I probably should have just gotten the chickens without the permit, but the house next door to ours was for sale at the time and I didn’t want to go through the whole process of getting chickens only to discover my new neighbors might not be so into the idea.  So eventually I decided to cover my bases and go through with the permit process, even with all the red tape.  Which leads me back to the site visits.

I have a confession to make here.  I actually kind of broke the rules a wee bit, you see, I actually went ahead and got the chicks before I knew that a site visit would be necessary.  And before I actually got approved for the permit.  I was excited.  I just needed to dive in, and I figured it couldn’t be that difficult to get approved. On May 8th 2009 I took the plunge and drove 35 minutes to a family farm in Greenfield MA and bought what I was told were 8 female chicks.  Pretty exciting stuff.  Especially for my kids, who were 3 and 5 years old at the time.  So now we had a big blue plastic bin with 8 chicks hopping around, a feeding dish, a water bottle, a red light to warm them, and two very ecstatic children.  And no idea what we’re doing.  Learn as you go, right?  Couldn’t be that hard… and truthfully it wasn’t really that hard.  We just didn’t realize how fast our chicks would outgrow (and start to escape) their comfy blue bin in our basement, and how soon we would need to transfer them outside.  So we made a really rickety make-shift chicken run so they could be outside during the day, and sleep in their blue bin at night.  Sounds simple, but it involved catching them all and bringing them in each night.  I still have images of the chick that escaped and gave my husband a fun time (picture large guy diving into shrubs repeatedly). It must have taken almost two hours to catch that thing once it got free!  When the chicks outgrew the blue bin completely, and the weather had warmed up, we stopped transferring them indoors and had them sleep outside.   I bought a very little pre-fab chicken coop that wasn’t going to be big enough for long (it was designed to house 2 adult chickens), and it was way overpriced, but it was predator-proof and it gave us a little time to figure out what kind of a larger coop to build.  Tip: when buying chickens, build coop first, then buy said chickens.  We ended up hiring someone to help us build a 6ft by 8ft coop with an attached 10ft by 6ft outdoor run.  But in the meantime the town notified me that site visits on our property would be necessary in order to get the permit to have chickens.  So… how to get rid of our chicks and make it look like I never had any in the first place?  Well, that involved a 12am stealth operation which employed the use of our friend’s grease-run school bus, 8 chickens, and two bearded men- and which resulted in relocating the rickety make-shift chicken run to my friend’s house.  Where they subsequently escaped.  Yeah, I was a bit stressed by this point, but I bravely headed over to their house alone the next day and got all the chickens back into the coop by myself.  True story.  Then, I pulled off the two site visits on my property with two members of the Amherst zoning board.  That patch of hay where the rickety chicken run had been? Oh, that’s just a new garden bed that I’m working on….

So, with the site visits and the stealth chicken mission accomplished, I moved forward and attended the public hearing of my proposal at town hall. You can see at this point how committed I must have been to keep going.  Well I was really committed, and they approved my plan with some stipulations.  So we built our coop, put our now teenage chickens into our coop, and began waiting for eggs.  Life was good with chickens for a short while until one of our teenage “hens” started crowing loudly every morning.  Well we really weren’t sure why that chicken was so loud- until we looked up the breed online again and realized that actually, there were two roosters mixed into our flock.  Oops.  Ok so now for a trip back to Greenfield MA where I returned the roosters.  And finally, we settled in to enjoy our remaining 6 backyard hens!

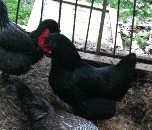
Our chickens grew up quickly, and when they started laying at six months, the eggs came pouring in!  We were getting roughly 5-6 eggs a day from our 6 chickens, and they continued laying all winter long.  The breeds we chose were perfect. We had three auracaunas which lay pastel blue and green eggs, and three black australorps, which lay nice big light-brown eggs.  Early that spring, I fulfilled my dreams of harvesting and making 100% home-grown omlettes.  I was elated!  And the work it took to keep the chickens fed and their accommodations fresh and appealing was a good reason to get me outside and breathing fresh air every day.  Not to mention, in addition to the organic feed we provided, they ate up our food scraps, grass clippings, garden weeds, and compost, turning our waste into yummy eggs.  We got a delivery of cheap hay bales from a local farm and used hay to keep the chicken run fresh and dry.  They loved it, and always appreciated our attention.  Even the neighborhood kids would frequent our backyard to feed and play with our chickens.  All in all we adapted quite well to the shift in our lifestyle.  So don’t let the first half of my story scare you off- I do highly recommend you try this at home!

The following year our hens continued to lay lots of delicious eggs, roughly 4-5 per day.  Dark yellow yolks, fresh as can be, and really the best we had ever tasted.  Many friends commented that these were the best eggs they had tasted as well!  And although we had a few run-ins with a local skunk (thankfully no one got sprayed!) everything seemed to go fairly smoothly, and all we lost to predation were a few eggs.  We were careful to make sure our coop was predator-proof, as we live adjacent to conservation land that certainly is a home for some wild animals.  All in all, we kept our lovely flock for almost 3 years, at which point they were laying about 2-3 eggs per day (the amount of eggs that chickens lay decreases steadily over time).  In the meantime we had a third child, and the winter was coming, so we decided to take a break from chicken care and try to give them up for adoption.  Don’t worry- we’re still planning to continue to raise chickens here.  But my kids are really bent out of shape about getting new pets, and chickens are about all I can handle right now.  So we decided that we will buy new chicks for the kids to take care of come the spring.  In addition, we want to make some improvements and repairs on the chicken coop.  Luckily I found an extremely kind woman from the local area who adopted our hens and is letting them free-range on her farm for the rest of their days.  We didn’t want to eat our pets, and we’re happy they will have a good life.  We can even come visit them, she assured us.  So it’s nice taking a little breather from operation-chicken this winter, and we plan to dive back into it this spring.  In the meantime, I am buying home-grown eggs from a friend locally.  The eggs are really great, and super fresh, but it’s not quite the same as having your own chickens.  I mean, once you get started with raising backyard hens, and enjoying all the fresh eggs, there really is no turning back!

Posted in Uncategorized | Tagged , , , , | 1 Comment

Elderberry Echinacea Immune Tea

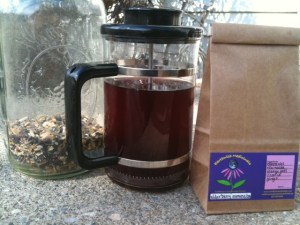
Today I am excited to offer Earthwise Medicinal’s first tea blend: Elderberry Echinacea Immune Tea, now available in 4oz packages!  This tasty tea gently stimulates and supports the immune system and when steeped, turns a lovely deep-rose color.  Elderberry tea is delicious just about anytime.  This blend has a naturally sweet flavor and therefore requires no additional sweetener- making it a great choice for kids.  This tea can and should be steeped twice for added value (just pour another pot of boiling water over herbs a second time and steep for 10 minutes).  This is my go-to recipe whenever I feel slightly run down, a scratchy throat, or an oncoming cold.  Often when I use this tea in conjunction with miso soup, extra rest, raw garlic pesto, and facial steams with essential oils, I am able to fight off oncoming cold symptoms before they set in.  I hope you will enjoy this hand-crafted tea blend!

Ingredients:  elderberries, echinacea angustafolia root, orange peel, licorice root, ginger root

4oz package loose tea: $8

Posted in Uncategorized | 2 Comments

and the winners of the free giveaway are………

wintermint lip balm winners:

Cheri Ross
Nicole Brackman
Tamar Helfen
Amy Mandaean
Sarah Heidling
Tova Brody

rose hydrosol mister & wintermint lip balm winners:

Maia Nechama-Rachel Campbell
Stacey Shoshana Lotwin

1 Grand Prize: 1/2 hour herbal consultation, rose hydrosol mister & wintermint lip balm winner:

Cindy Kornet!!!

To claim your prizes, please email me at earthwisemedicinals@gmail.com and send me your mailing address, or if you’re in my local area, lets set up a time for me to deliver your goodies. Congratulations to all the winners and thank you for entering the free giveaway!

Posted in Uncategorized | Leave a comment